The Glider:
After building the six-meter, short spanned Habicht G, I was left with a pair of eight-meter wings. Short hop into the future. We're in the middle of a pandemic. No essential work, so no income or chance to acquire it. Full quarantine enforced. What do you do, other than watching scale modeling videos, battle crippling depression and watch three months go by without a clear outcome on sight? You build model kits. Not the new ones - Last bought some three years ago -, but the ones on the Shelf of Doom. It can be done. It's feasable. It took a bloody pandemic, though. But it's no small feat, old chaps. It'll make you feel better.
After clearing the backlog it was time to rumage through the boxes. Wanting to build yet another glider - those articles are yet to be written - and after finding the original italian article to the pictures of the camouflaged 8-meter Stummel Habicht which are commonplace on the Internet, I set about construction. Let's dwell into a bit of history first.
As the war approached its closing stages, the Northern Italy theater of operations saw the tide of war turn increasingly against the Axis forces. Even if the difficult terrain made the Allied advance slow and difficult, the air war continued, unabated. To the shortages of flight crews and ground personnel, the italians of the ANR, the Aviazione Nazionale Repubblicana - the remnants of the Regia Aeronautica still following Mussolini's regime - found themselves in the unenviable situation, once again, of having to rely on their ever adamant german allies to provide aircraft and armament since their own aviation industry had everything but ceased to exist.
 |
| One of the 8-meter Stummel Habicht F used by the ANR pilots. |
 |
| Was it not for this series of photos, there would be no record on camouflaged Stummel Habichts. |
 | |
| Ten. Giuseppe Biron in the cockpit of a hastily camouflaged Stummel Habicht F. |
 |
| 1° Gruppo Caccia pilots. |
 |
| Ten. Mario Zuccarini in another Stummel Habicht F. |
The kit(bash):
Having the excellent plans by Vincent Cockett, I set to building the fuselage and tail control surfaces for the 8-meter Stummel Habicht. Having already completed several scratchbuilt gliders, I now felt secure enough to face the challenge. I still have to overcome the dreaded "gull-wing fear", though.

The Warlord wings were... Well, what can I say? Crude is the word. The feeling is much, much worse. Being fortunate enough in that it was only the wings and not the whole kit again, the plastic "excretions" and growths were chopped, filed, cut, you name it. One thing's for sure: "flash", they were not. Further polishing of the outer surfaces was done once the inner ones were thinned enough to match the profile and glued together.

Last year a friend of mine sent me a small cut out of PVC board. Impressed with the ease of use in a different glider project, I was very happy when the local publicity workshop handed over to me a cut out of a harder grade. The key to PVC board is that it runs stiffer in one axe than the other. For wings the ideal approach is to work the stiffer axe toward the tip, which alse eases the work on creating the wing profile and prevents the wing from bending over time. Regarding to the fuselage, it's the same. You want it to have longitudinal strength but to be easily filed and sanded to shape.
Taking the Cockett drawings to 1/72nd scale, the fuselage was contoured, the cockpit hollowed out and then the spine fashioned out of a PVC strip, while the lower fin section was a thick, rigid plastic card piece. The wing roots were fashioned out of PVC as well. Mind cutting them longer than they should, to take into account the classic wing fillets of the original design. Everything was puttied and wet-sanded smooth in this first step.

With the basic fuselage complete, it was time to glue the wings and nose cap. A few dots of CA glue secured the wings in place, then UHU plastic cement was used to attach them securely to their roots. The UHU cement works wonders with this kind of PVC so it can be used securely and provides a strong, durable bond between parts. The nose cap is a simple PVC leftover of proper size which was later filed and wet-sanded to shape.

Don't mind the putty mess. I'm usually on the heavy side of things when it comes to putty. On with the wet-sanding!

After some tidying up, the end result looks far better. The tail surfaces were cut and shaped out of 1,5mm plastic card, my usual game in town.

And now kiddies, a funny fact: Always check your references and plans. Somehow I got in my head that the fin leading edge mated to the stabilizer through a curved transition. Very much like the lower fin section.

I glued the fin to the fuselage. And it simply looked odd. Continued to add the elevators and rudder. Took me ten minutes to notice the error. But a couple of passes with a file and sandpaper fixed the error. You're never too old to learn, they say. And neither to F##k up. Main thing is to solve it.

Looking at it now and as i write these words, a month or so since I finished the "kit", its lines have grown to me; I've come to regard it as far more accurate than the original Warlord kit. The rectangular cover over and under the wingroots and the fuselage inspection hatches were marked using a rounded tip scriber.

The Habicht has some very prominent trim tabs and rudder actuators, so they were fashioned out of plastic card and stretched sprue. Same for the struts and tail skid. All in all, a small but very rewarding detail added.

With the main build complete, it was time for priming. Monitor's gloss Middle Grey enamel was sprayed on the airframe since it is, to all matters, a fairly indestructible coating material.

It was here that I found my trusty Humbrol H-41 Ivory tinlet had parted company with the real world, leaving us here to join whatever realm it is that dry and empty tinlets go to when they pass away. After looking for a suitable replacement I came to settle upon arts & crafts acrylics which actually suited the two shades of RLM 05 seen on civilian aircraft and gliders. These are 03 Ivory and 04 Almond by local producer DelArte and higly recomended. Since they're thick, a thinning medium by EQ Arte and 50/50 ratio mix of water and rubbing alcohol were used to bring 03 Ivory to a spray-able dilution. Here you can see 03 (left) and 04 (right) side by side on a small plastic test piece.

To be honest, I was surprised at how well the paint settled on the model. No pebbling, no runs. It covered every corner and crevice evenly in one single coat. When dry, it was impossible to scratch or dent. Well done, DelArte!

Onto the camouflage. Studying the photos and doing some comparisons, the only colours that seemed to match the greyscale were RLM 61 Dunkelbraun and 62 Grün. Specially when compared to the absolute dark hues of the Stummel Habicht in the middle on the second and fourth pictures. The mottling infill is a clear giveaway, and I seriously doubt they'd use late war RLMs to camouflage these machines on site. So, off with the ModelMaster range! I've had these colours for about... I don't know. Over a decade. Never used them even having the kits to do so. Life gets in between and kits come and go. You know the drill.

After careful study, RLM 61 was sprayed first, trying to "weave" the effect as in the pictures.

The contrast is beyond stark, and for a moment I considered polishing and repainting the whole thing. It just looked odd.

It was only when the RLM 62 spots were sprayed that the scheme finally came to be.


Due to my abilities the spots came out a tad larger than I expected, but the end result pleases my eye (Yeah, THE EYE).


The Bruhn tube was fashioned out of stretched sprue and a syringe needle, cut and polished. You have to check the position according to photographs, from what I've seen it varies depending on the Habicht model and if it was armed or not - that MP-40 folly -. Note aside for the cockpit. I made a control column, seat, leather coaming, head-rest and instrument panel out of scrap plastic. The I.P. was painted black, while the cockpit and seat were painted an acrylic Burnt Sienna and then given a black wash to represent the Kaurit-glued pieces. Head-rest and coaming were painted Red Leather Brown.

A wash made of black and dark brown was applied to the panels, and did some gentle rubbing off the camouflage paint to imitate wear and tear before the final clear cote. Humbrol Satin Cote was used for this. Final stages was to add the main skid, fashioned from a strip of plastic and painted with acrylics and water colour pencils to imitate wood. A scrap of clear plastic was cut to size and shape for the windshield and several pieces of dry-transfers used for the markings. Easy-peasy.

And here it is,in all of it's stubby and oddly coloured glory.


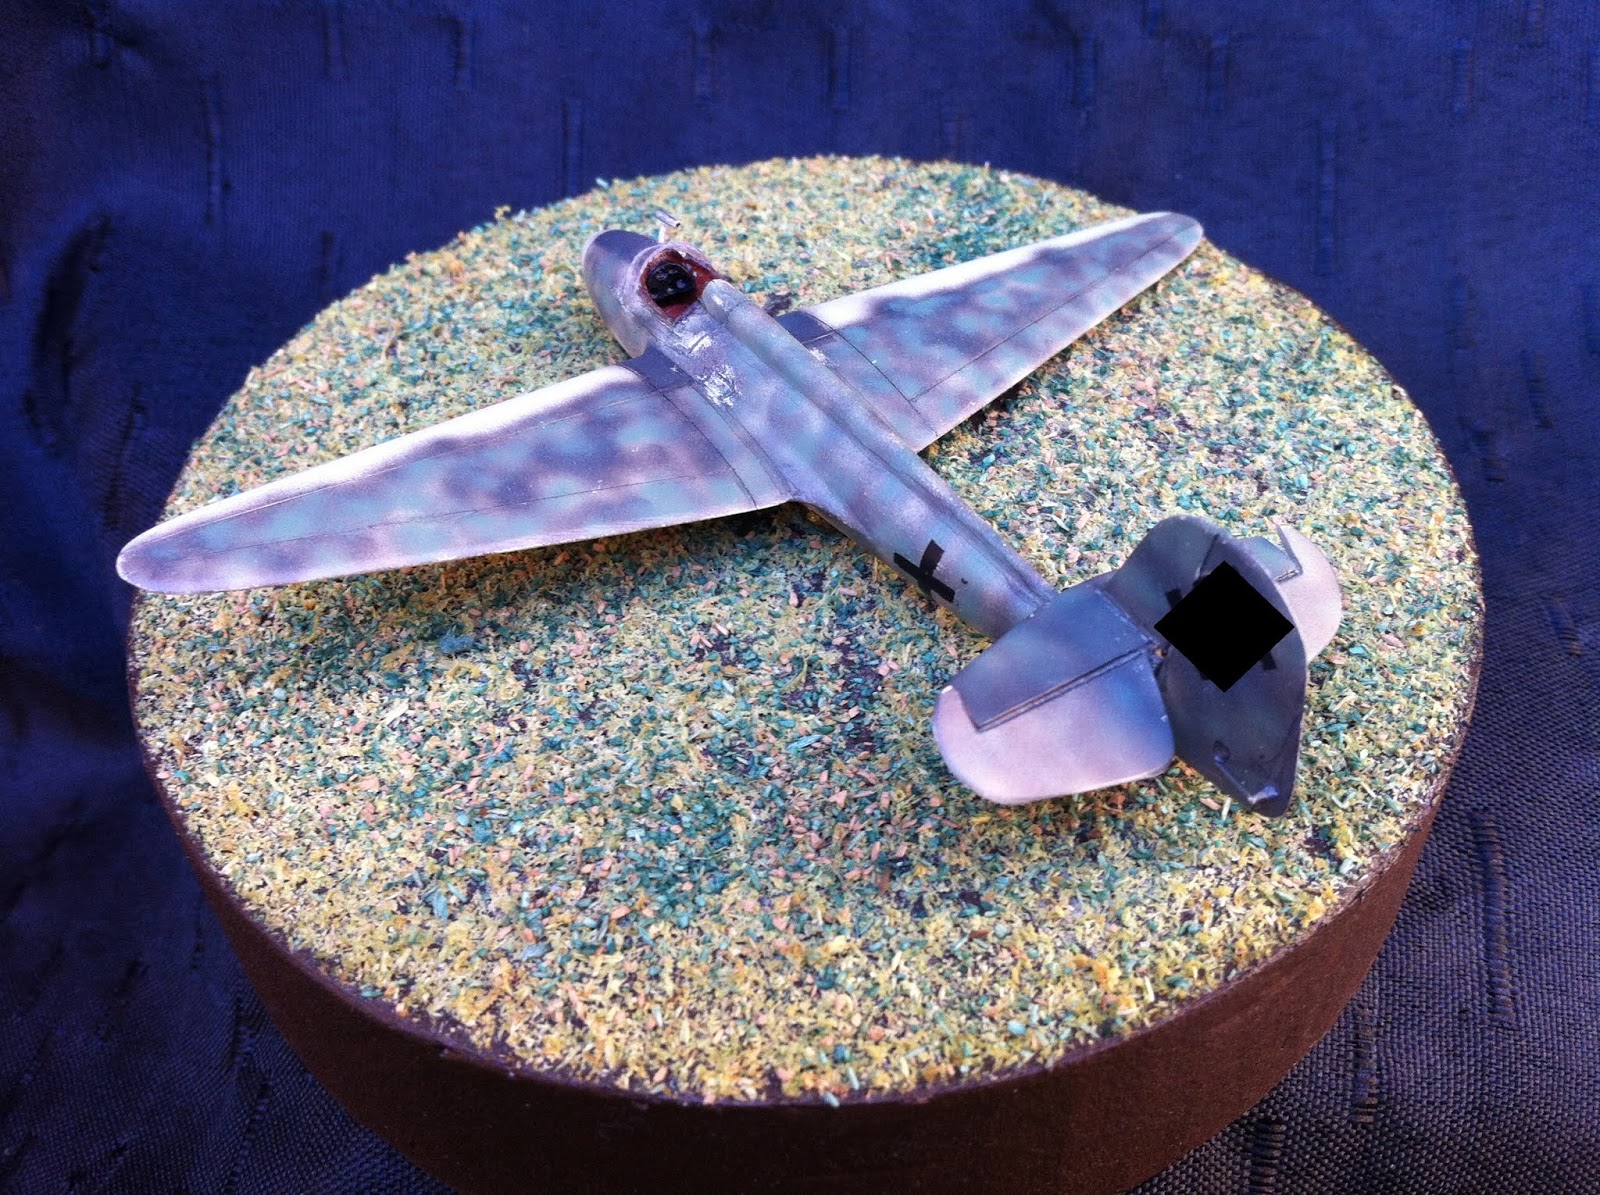


All in all, it was not a difficult project. Learnt a few more things and fine-tuned some abilities. Not a small thing, these days.
Stay safe. And as always, take care and good luck.
TMU
Comments