The airplane:
Aerial reconnaissance has always been one of my passions. Over the years, the growing numbers of kitted reconnoiteurs, spotters and that particular nasty gang of thugs known as assault aircraft has pleased the penchant of building aircraft with a very idiosyncratic design.
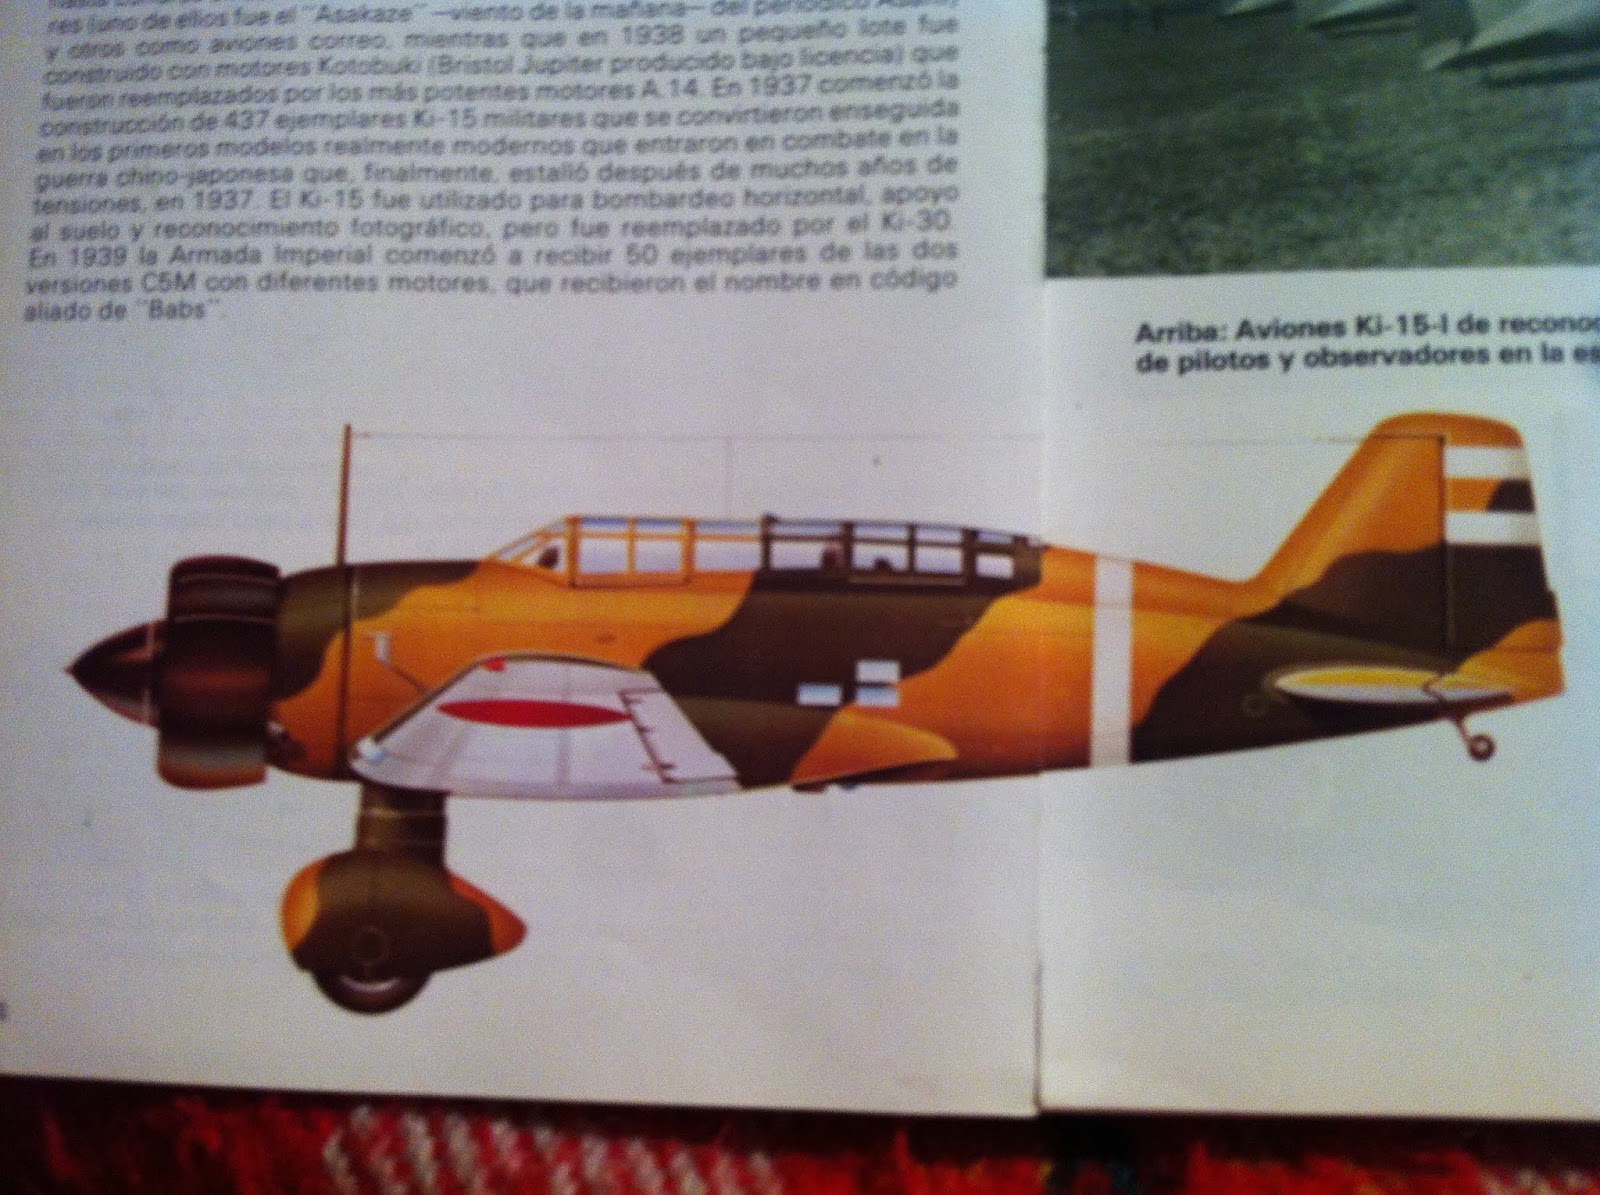
Take for instance Mitsubishi's superlative Ki-15 in each of its different iterations. Record breaking mail plane as the Karigane. Fast reconnaissance for the Imperial Army Command as the Ki-15-I. Then, a light bomber. Gets a new engine and better streamlining on the Ki-15-II version. The Navy casts an eye on it and purchases a handful as the C5M1. Gets delighted by it. Orders a new version in the C5M2. No more than 500 were produced altogether but their impact on the war with China and later in the early stages of the Pacific War were deep. So much so it would only be replaced in frontline duty by the superlative Ki-46 in July, 1941 but still be a worthy asset for the Imperial Army until well into 1942; later to be used as a trainer and several being expended in kamikaze missions by the end of war.
The kit: LS' venerable 1/72nd Ki-15-I:
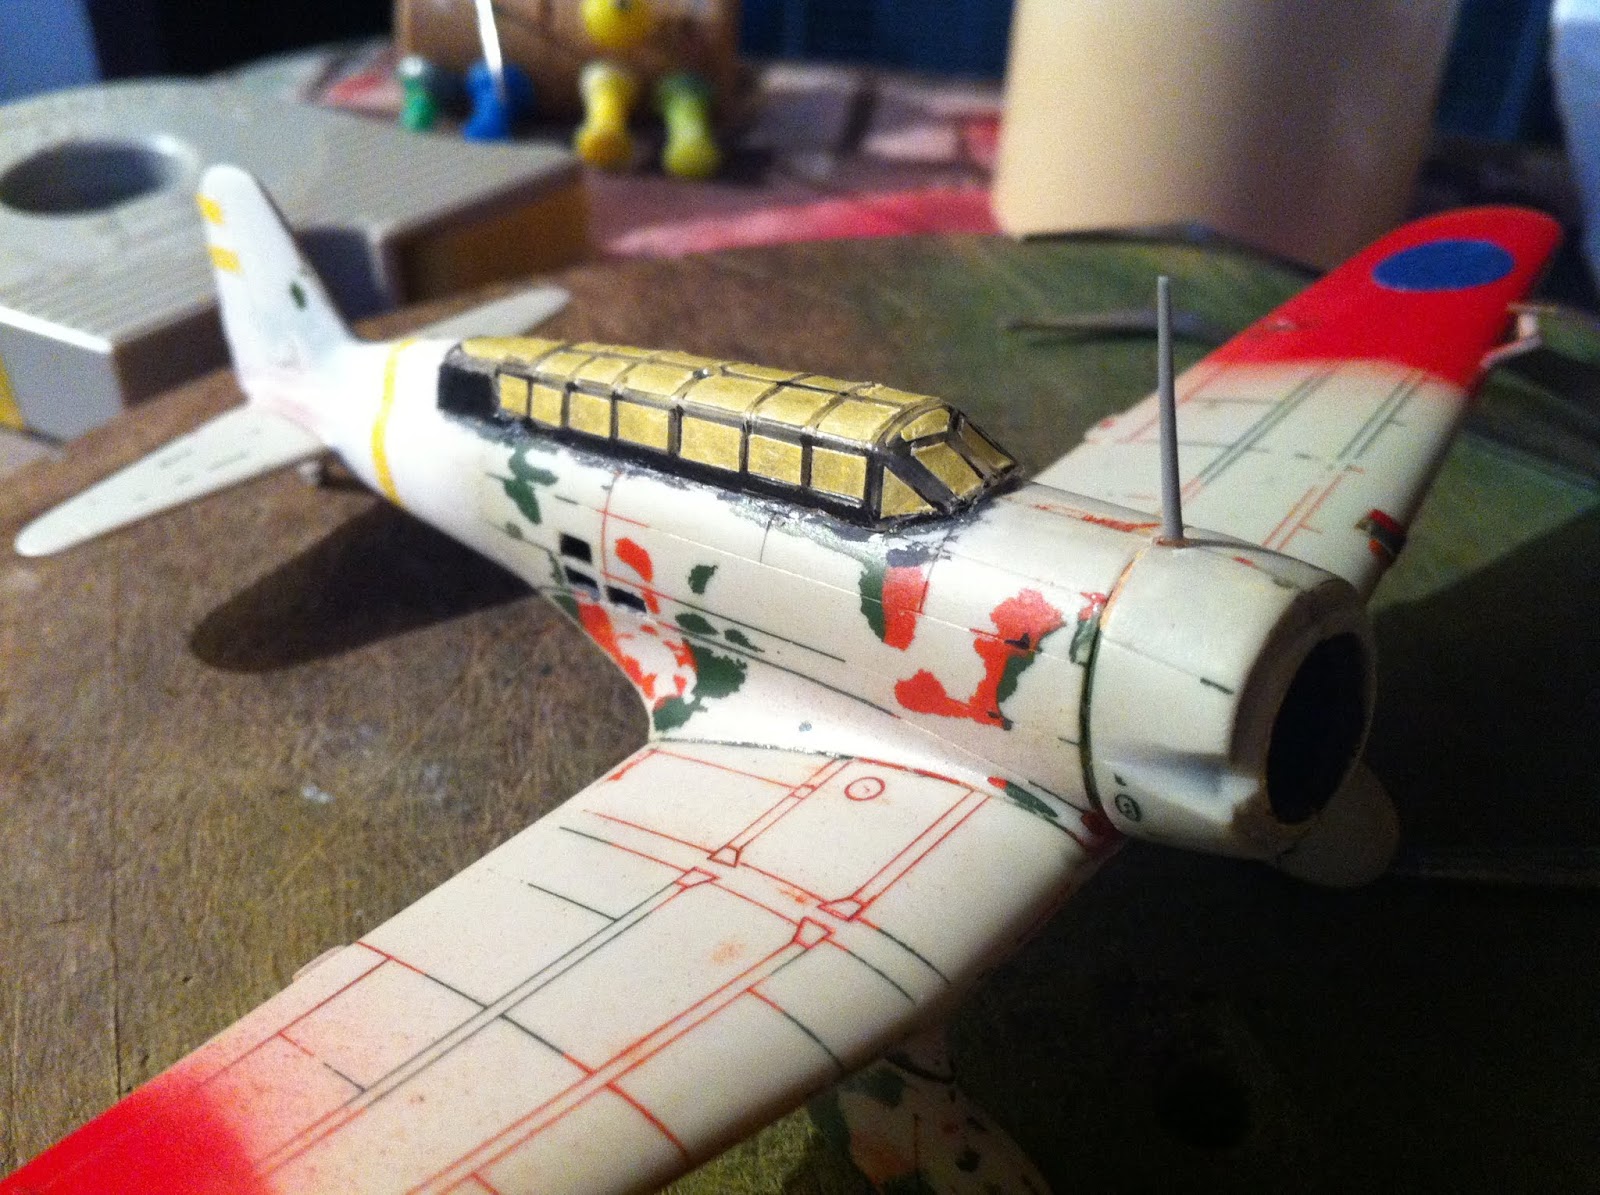
You know you have to show respect for a kit when it's two years your senior, first produced in 1976 (Thank you Scalemates!). The previous owner didn't - specially a cracked canopy, which I couldn't entirely fix - so it was hard work from the very beginning. Since I had already built a grey Ki-27, I wanted to display one of the field applied schemes to the Ki-15 during the Sino-japanese War. Several browns and greens were used, either hand-applied or prayed over the airframe. The best references are Ian K. Baker's series of articles dealing with WWII japanese aviation, first published in Scale Aviation Modeller International some twenty years ago; and the excellent blog maintained by Nick Millman, Aviation of Japan. In looking for the scheme, i came across this one from the 1st Chutai, 15° Hikosentai in the early stages of the conflict in China.
First things first, the model was stripped from its paint using oven cleaner and then rinsed with tepid, soapy water. It was mostly successful but some paint remained so it was water sanded as much as possible. Parts were carefuly detached from each other. Interior was furnished with a radio, camera and controls, all scratchbuilt. Seats were painted in H-56 Aluminium and got lapbelts made from tin foil, painted a sandy brown. The interior was painted in Humbrol's H-144 Medium Blue, which is a good match for the colour used by the army at the time and given a wash with H-33 to bring out the details. The camera and radio were painted in H-167 RAF Barley Grey. With it finished, the fuselage was closed and when dry, tailplanes, wing and canopy were attached. For the antena, the one from the Ki-27a by ICM was used, and the distinctive tail wheel and pitot tube scratched from various plastic rods and profiles.

Not having markings for the build, and these being very simple; the wings were sprayed H-19 Bright Gloss Red and the rear of the fuselage and rudder in Hataka's Matt White. These were masked over awaiting paint.


As can be seen from this picture, troughs were filed into the fuselage both for the exhaust collector on the right side and the oil cooler outlet on the left hand side. With the canopy and landing light masked, it was spray time.
The entire airframe painted Humbrol H-147 Matt Light Grey, which is a good match for the IJAAF colour used at the time.


Once it dried, it was time for the light brown. For it a very nice hue is ModelMaster's RAF Middlestone. If you happen to have MM paints, cherished them. Some of these colours I've had them for 15 years and still work great. A tribute to the quality of production we seldom see these days.

Since I wanted to get a nicely blended colour demarcation, the wing and elevators undersurfaces were masked and Humbrol H-86 Light Olive matt sprayed free-hand for the wrap-around scheme. With it dry, the masking for the markings was taken off and any rough edges carefuly polished with 1200 grit sandpaper. It started to look half-decent, at least.


The engine, as received, was but a blob of thickly painted plastick, so it was sanded, rescribed and polished along with the propeller and hub.

The exhaust came from a highly modified Savoia Marchetti S.81 Pipistrello by Italeri and the oil cooler outlet from plastic tubing of a suitable size.

With that out of the way, the entire engine and hub were painted in Hataka's Night Colour. Cilinder details were picked with a silver pencil and dark grey washes. The propeller and oil cooler were hand painted with Hataka's AII Aluminium for a service-weary look and the red stripes masked and painted in H-19. The exhaust got Humbrol H-70 brick for the basecoat.

I intended to give the aircraft a worn look, typical of the field conditions you see in front line units of the IJAAF during the late '30s. Having some old 10ml bottles of dried-up Tamiya paints, I poured some high quality Alba white spirit into the XF-13 IJAA Green, X-1 Black and XF-52 Dark Earth. A gentle stir with a stiff plastic rod and thorough shake provided the washes need. A thin black wash was given to the panel lines and surroundings and rubbed with a cotton bud.

It was followed by the IJA Green on the proper panels, as well.


The undersides were lightly weathered after taking the below picture with a medium grey wash.

The engine was glued to the fuselage, along the propeller and hub. The exhaust collector was given a rust and smoke effect with Mig's Aviation Set 7420. The panels near the engine and the oil cooler were given a slight dab of Fresh Engine Oil. While well kept, japanese radial engines were famous for their leaky gaskets and connections. So it's up to you wether you want to oil the engine bay thoroughly or keep it tidy. I went for somewhere in the middle, specially given the small scale of the kit.

Paint chips and wear were applied with dark, light grey and silver pencils, the mud and dirt replicated with the XF-52 wash.

A simple base was produced for the Ki-15, couldn't resist taking a few snapshots of it alongside the Ki-27 by ICM.


All that was left to do was to take the masking of and attach the antenna wire to the mast and the king post on the fin. Then it was attached to the base. And it was done.


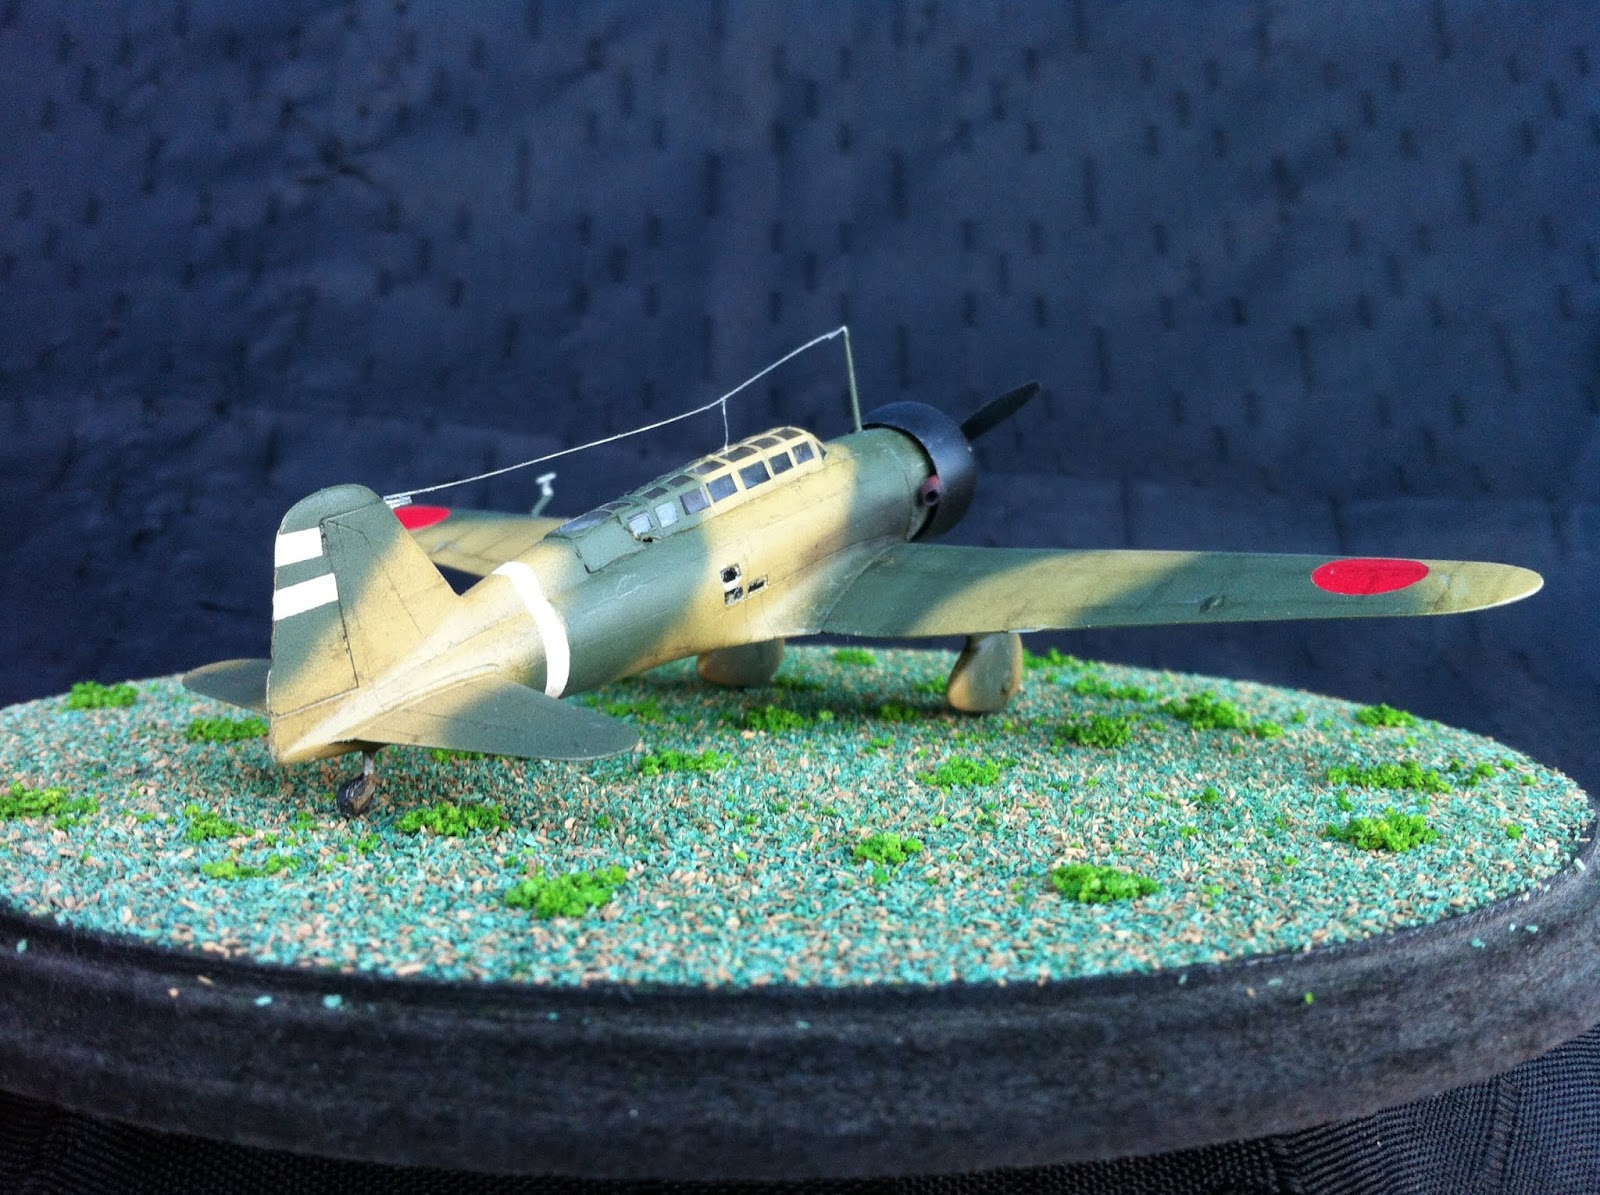


All in all, it was a satisfying build. Though the canopy was only marginally salvageable, the rest went along nicely as befits this kit, a worthy example of a bygone era in modeling. If you can get one, or the Mania/Hasegawa kit, go for it. You won't be disappointed.
Took over a yeart to write this simple article. Life got in the middle. And it's o.k. for Life to do so. These are just simple snippets of a hobby. And in these times of worry and generalized bru-ha-ha (Tom Lehrer dixit), take care and good luck. More than ever.
TMU.
Took over a yeart to write this simple article. Life got in the middle. And it's o.k. for Life to do so. These are just simple snippets of a hobby. And in these times of worry and generalized bru-ha-ha (Tom Lehrer dixit), take care and good luck. More than ever.
TMU.
Comments