The Glider. Taken from Wikipedia. I hit the "Lazy" button today after the morning temperature hit the 30ª Celsius mark (it was written around December, last year):
"The ISTUS international soaring demonstration was held at the same time and in the same place as the 1936 Olympics to make the case for gliding's inclusion as an Olympic discipline at later Games. The proposition was accepted and there would have been gliding events at the 1940 Olympics had not World War II intervened. Rotter, using his experience of designing the successful Karakán, was responsible for both designing and flying the Nemere, Hungary's representative.
The Nemere's progression from the Karakán was most evident in the wing and its mounting. The modified pedestal mounting to the fuselage had gone and instead the Nemere had a shoulder wing mounted on a 1,150 mm (45.3 in) span centre section built as part of the fuselage. The wing was a cantilever structure, without the earlier lift struts, continuously tapered in plan from root to tip with no externally distinct centre section and with 2° of dihedral. There was continuous taper in wing section also; Rotter returned to Göttingen airfoils using Gö 646 with a thickness to chord of 19% at the root, varying through Gö 535 to a thinner, less cambered, tip. Like the Karakán, the Nemere had a plywood covered D-box ahead of the main spar but, with the external struts absent, plywood covered more of the inner wing back to a diagonal internal drag strut. The wings were fabric covered aft. Broad chord ailerons occupied the outer 60% of the wings, which ended in elliptical tips.
The fuselage was a ply-covered semi-monocoque, teardrop shaped in cross-section, which tapered markedly behind the wing. The canopy was a wood framed multi-transparency unit, similar to that on the Karakán, but with more panels, which preserved the contours of the upper forward fuselage back almost to the wing leading edge. The tail was conventional, with an all-moving tailplane, mostly fabric covered. The rudder, mounted on a short, narrow fin, was balanced, rounded and full. The Nemere took off from a small, two-wheeled dolly and landed on a long skid under the forward fuselage, assisted by s steel tailskid at the rear.
The Nemere flew for the first time on 25 July 1936 only a few days before the demonstrations held at Berlin-Staaken airfield on 4 August. Sailplanes from Austria, Bulgaria, Germany, Italy, Switzerland and Yugoslavia flew alongside the Nemere. A week later, starting from Rangsdorf some 24 km (15 mi) south of Berlin, Rotter made a flight to Kiel where the sailing events of the Games were based. He had nominated his objective the day before and covered the 326.5 km (202.9 mi) in 3 hrs 53 min. It was the longest glider flight in Europe in 1936 and won Rotter an ISTUS Gold medal.
On 13 June 1937 the Nemere was damaged in a bungee-cord launch and was rebuilt with Göppingen airbrakes, the aileron joint adjusting lever, previously behind the pilot's head, moved under the instrument panel and the rear canopy oval side openings replaced with rectangular ones.
The Nemere continued in use until at least 1943, mostly slope soaring near its base at Toros, west of Budapest A few long distance cross-country flights were made, including one of 230 km (143 mi) from Hármashatár-hegy in Budapest to Ciucea in west Romania, though no more records were set. Later in World War II it was slightly damaged but was restored to flying condition. In 1948 it was broken up."
Rotter seems to have insisted that his glider had been "murdered" by the post-war communist regime. And he didn't seem to be too off on that one, given how things ended up. Rotter devoted his life to working in engineering, ultimately passing in October, 1983. Not everything is lost, for the Nemere is making a comeback through hard work and passion by a group of hungarian enthusiasts. You can visit the Nemere Project page on Facebook and see for yourself.
Technical drawings found on the Internet. Martin Simons beatiful 3-view drawing and several from hungarian and french publications.
The model: scratch-building insanity is our business!
Having thoroughly enjoyed the IS-1 Sep build last year, not wanting to "spend" the Bocian and Mucha Standard kits that fast and hooked-up again on gliders - that long, unfulfilled love of mine - I stumbled upon the Nemere while researching for the Stummel Habicht, which a good friend of mine gave away as a gift. It had the three basic requirements for any build I undertake: it was from a country I like, beautiful design and a great story behind.
To refresh one's scratch-building abilities - or lack thereof - is always an exercise in planning and dexterity itself, both mental and physical. I started by profiling the fuselage bulkheads and cutting longitudinal sections secured in place with superglue and bits of plastic, then fine-tuned to make the sections match.
The wing root profile was added as a single piece to each side and reinforced with tabs glued to the transverse bulkheads., since there are some 27cm. (almost 11inches) of wings hanging of it.
I complicated myself on this one. I think theres seven or eight tiny bits of plastic for the lower cockpit spar. On it will be attached the seat, control column, rudder pedals and instrument panel.
With such long wings, and still experimenting on the approach to scratching them, it felt best to replicate to a certain degree the original structure of the flying surfaces.
The double sparred, counter-braced central section of the wing provided a sturdy basis on which to build. The original wing profile was replicated at the root and mid wing, all being glued with UHU plastic glue so it would weld the joints and provide additional strength.
Before carrying on further with the wing structure, the mid-fuselage was covered so the wing root could be conformed to shape.
With the fuselaje covered, the outer wing structure was continued, flat pieces of plastic were used.
The roots were covered and cut to shape. Important tip, here: Don't use glue of the melting type. The wrinkles on the fuselage were quite a surprise. Use only superglue.
The wingtips were cut to shape and added. Mind I did a mistake on their shape, one being too broad, which I only realised once the model was finished.
With that out of the way, the wing covering was tackled. Due to my lack of recent experience I did a counter-covering on the lower fuselage side solidary to the wing. Since these are curved pieces of plastic, they will work against each other and provide aditional strength to the joint.
Covering everything was very straight forward, using plastic panels cut and curved to shape.
With everything roughly covered, it was time to adress the cabin. Edges have a forward slant which ends in the forward "lip" were the cabin is secured.
Cockpit parts were scratch as per the reference photos, the seat is a three-pieced affair, to reproduce the curved shape of the original.
Here's a clearer look.
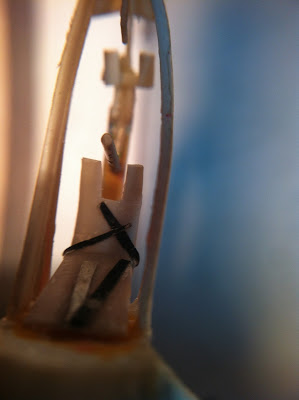
Sometimes zooming in is not a good idea :P
A side shot of the cockpit. Here can be seen the particular shape of the cabin floor, rudder pedals arrangement and seat fixation points. The lower fuselage below the forward wing edge was left uncovered at the time, for i had not find out a way to cover it and replicate the particular shape of that area.
While trying to find out how to deal with the forward wing root, the cockpit was covered with thin plastic strips roughly contoured to shape.
Which gave a nice inner effect. I had started testing colours for the wood base, as can be seen here. That was Humbrol's H-63 Matt Sand.
The instrument panel rests on a shelf attached to the removable canopy on the original, so it was added. You have to be careful not to cut the piece too wide, so it can sit nice and tidy and not hinder the fit of the canopy.
First scratch-built project. And it shows. The covering for the transition between fuselage and wing root was done by cutting small sections of curved plastic stock and attaching one at the time. It's time consuming, but rather amusing.
Diamond in the rough? Highly unlikely. But the thing was about there. On the left side of the picture you can see the original fuselage shape, and on the right after it was reshaped to make it rounder.
Using an old arts & crafts acrylic paint is very useful for when you have to putty a bazillion seams!
Here's the almost finished fuselage. The recess under the fin was for the tailskid housing, fashioned from round plastic stock and hollowed to take in the skid.
Now it was time to move on to the smaller details.
Here can be seen the map folder, instrument panel and dolly minus its wheels.
The tail sirfaces were cut to size and sanded to an aerofoil cross section.
The different tonalities were reproduced as per the rather extensive photographic resources available on the web.
The structural lines were drawn on the wings so filling in with woodgrain was easier.
For my first true overall woodgrain effect on a model it wasn't that bad. Things have improved on later scratchbuilt projects which I hope to share soon.
The cockpit had a wash of acrylic burnt sienna to make things stand out, the metal parts picked with humbrol's H-191 Chrome Silver and a wash of H-56 Aluminium.
For the fabric-covered surfaces, H-41 Ivory was used. It gives a more bleached appearance than Linen or Oak colours.
Lacking decals for the model, I set to replicate the markings via Letraset dry-transfers.
Not happy. At all.
In the meantime the control panel was attached, in preparation for the smash molded canopy.
The wing and fuselage markings were rubbed on. Letraset patterns settled down nicely onto de curved surfaces. It just takes time and patience.
The rudder had its woodgrain pattern applied and varnished for protction. Once dry, Humbrol's H-22 Gloss White was sprayed on, and the H-3 Brunswick Green and H-19 Gloss Bright Red. The dolly was painted with Hataka's AII Aluminium and Night colours.
Final attachment of the separate pieces started, the rudder went on like a charm. Carful preparation prevents the paint coat from fouling the surfaces and provides a better fit of parts.
The "almost there" moment we all experience. Ailerons were carved out of wood since all my attempts to replicate them in plastic failed miserably.
Looking like a charm!
I tried to smash mould a transparent canopy out of clear plastick stock, but after the eighth or ninth attempt I called it quits. The other option was to replicate the original structure. I effed up the shape, making it too squarish, when it should be rather ovoidal in shape. Remember the "almost there" thing? Yeah, a case of those.
The model was clear coted with Humbrol's Satin Cote varnish.
The olympic rings were painted on using a dremeled tube stamp.
Not my best, I reckon. But the effect is there.
The Venturi and Bruhn tubes were fashioned from syringe tube and scraps of plastic.
The letraset name, having sustained damaged, was replaced by a clear decal with the name written on it.
Humbrol's Clearfix was used for most of the windows. It's time consuming but it gives you good results.
For the rear quarter windows, the best of all the smash molded canopies were selected, cut to pieces and attached to the canopy.
While finishing the Nemere and trying to vent off so many frustrations, I started the second scratchbuilt project, the Akaflieg Darmstadt D-28 Windspiel. I still have to finish the tiny bugger, it's missing its decals.
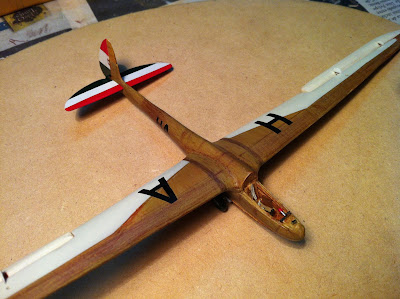
The dolly was attached to the skid and that was it. Finished.
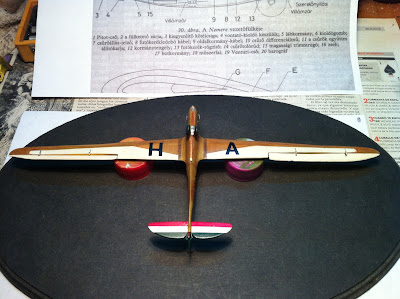
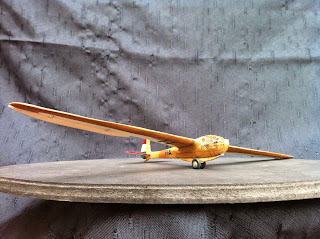
Some shots in broad daylight.
It's not without its faults - all mine - but I like it. It meant quite an excercise in provisions being made for a kind of build i had not had the chance to practice in many years, and I've learnt a lot from it. It's been a year and a half from when I finished it and the glider family has been furthered expanded: the Windspiel, the Darmstadt D-15 series has two members already built, the "Westpreussen" and "Minister Leuschner", also the 8 meter Stummel Habicht and one of Korolev's early gliders, the "Koktebel". Now on the works is Alexander Schleicher's first high performance glider, the "Stadt Frankfurt".
Does it mean giving up on military modeling? No. It means walking down two of my favourite paths: researching the forgotten side of aviation and having the pleasure of building what I like, the best way I can.
Take care and good luck,
TMU.


Comments