The Plane:
The 763rd Air Regiment was one of such units. In origin a transport regiment equipped with both liaison and sanitary versions of the already venerable Polikarpov U-2, it had made a name for itself thanks to the many risky reconaissance, liaison and medevac missions on the Crimean Front beetween February and June, 1942. When transfered to the Caucasus, the already seasoned pilots found themselves into an even worst case scenario than before.
Even if the Crimean Penninsulae was rugged and mountainous, the Caucasus with its high peaks, tiny airfields hastily created on cliffhanging plateaus and thin air presented a totally different challenge to aircrews. Not only the climatic and operational conditions were extreme, also the shortage in personnel and machines was critical. To make up for the losses, many a U-2 was withdrawn from both the military and civilian flying schools in that vast region. Problem was, the schooling U-2s were not fitted with either the blind flying instrumental nor the bomb carriers to perfom their military tasks.
Light carriers DER-7 were first fitted under the wings for any ordnance that could be attached to them, mostly light bombs of lower weight than the ubiquitous FAB-50. Wings were not reinforced so the caveat was there, even with the legendary weight-lifting abilities of the U-2. The engines were the original trainer ones, low powered when compared to the later versions. Things started to improve as the first reinforcement kits and "bomber wings" arrived and were fitted to the trainer airframes, allowing to place four carriers and their respective FAB-50s hanging from the undersurface. The latter came with the factory made cutout in the right wing for the bombsight, which before had being unceremoniously cut off in the field on the trainer wings. The bombsight was made true and screwed to the right hand fuselage side.
There were blind-flying instrument panel kits sent fo the conversion of the old warriors but their arrival to the unit was far and in-beetween. For the most part, they flew un-armed; that until the VS and later LNB versions started arriving with either DA or ShKAS machine guns. Talk about sacrifice. Thus lightly equipped, the 763rd carried on countless day and night flights, usually bombing pinpointed German positions, when not bringing much needed supplies for the garrisons and carrying wounded to the rear of the front; gliding in the thin air across mountain passes on short breathing engines or using the steep and usually impossible terrain as a defense against the ever present enemy fighter force.
Luck struck when researching Option 65 of the humongous South Front Decals sheet on the U-2 for this build, for there was a picture of three of the makeshift 763rd LNBAP bombers on the Internet. It displays white 5 (the subject of this build), 12 and 26 - maybe it is "2b", after the Ciryllic B (Б or б) - flying over a wooded area and an improvised airfield atop a plateau. They're war and weather weary machines. It's plain to see from their paintwork. See the gorge to the right? Not a nice spot to land if the worn out engine quits on you while taking off, bomb-ladden and in the middle of the night.
News flash! Months after finishing the kit, I found several pictures on the Internet. An up-close shot, large sized copy of "White 5" and the others shows it didn't have the wing cut-out. It also has a thermometer or barometer afixed to the middle interplane strut. "White 26/2Б" has no remarcable things to speak of and "white 12" is actually in a green-black two tone scheme. Talk about bad luck.
The original picture I found:

A better quality, larger copy. Here "White 12" two-tone scheme is very clear.

The two other "Raggle-taggle" machines. White 21 and 15.

The replacement upper left wing section, and lower left wing aileron on "White 15" are noteworthy. Early and late AII Green comparison, perhaps? The upper wing marking seems to be painted in the later shade of AII Green. They all look extremely battered, repainted and with some extent of field repairs and patching. Also, the number's typography is noteworthy on this two other machines.
They all seem to be carrying grain sacks in their rear cockpits. Not at all strange, since the mal-nourished soviet troops would always welcome whatever it was the received for a meal.

The Kit: Polikarpov U2VS, ICM, 1/72nd.
A close friend of mine got me this and the ambulance version when visiting abroad, so they were a welcome addition to the Kukuruznik saga (Four built as of writing this, and one to go. So many Kukuruznik needed, so little money!). They make for an excellent model, care being taken to address the following issues: The propeller turns the wrong way and the twin exhaust collector for the left and upper cylinders was not added to the sprue. The 1/48th scale of the kit covers these two points of worry, so you can build it as it is. All in all, it's a nice war-time issue model, even a post 1938 model can be done by filling in and deleting some details.
Build was rather straight forward (I'm writing this some three years after completing the model so bear with me), except for the forward fuselage which required some tweaking and sanding due to the rather strange plastic used, quite vynil-like.

The lower part was bent out of shape so it was talked - cussed - into proper alignement. Flash was not heavy but difficult to sand in places due to the plastic.

Some putty was required in spots, but I'm very impressed with the quality of the kit. You have to add two small stubs made out of stretched sprue for the elevator horns either side of the fuselage. Otherwise these will stand flush to the surface, preventing the rudder wire from passing beneath them all the way to the forward fuselage.

Care must be taken to drill further deep the holes for the struts, these being too shallow. All in all, aligning them is no too much of a nuissance, biplane wise. Just clean them with due care and dry-fit as much as you can.

The engine is a three piece affair, quite simple and detailed.

Holes for the rigging were done with a fine 0.5mm drill bit.

Inner colours were Humbrol's H-27 Blue Grey for the A-14 interior grey and H-33 for the panels and sundry bits. Belts were fashioned from wine foil and painted a suitable sandy khaky brown.

A nice touch by ICM is that the landing gear legs are keyed so they will not be mixed. Careful cleaning and fitting makes for a snug and problem - free attachment.

Onto painting! Being a pre-war machine, and following the South Front Decals excellent instructions, the scheme was to be AII Green and AII Aluminium. Hataka's beautiful set for early VVS machines was used. I can't stress enough what a beautiful product they are. The tail surfaces were painted sepparate from the fuselage since it makes for an easier paint process and later attachment.

A truly beautiful, rich green it makes. Mind it's the later, lighter AII Green version Hataka has provided, so machines from an earlier period - before 1938 - need to have it slightly darkened.

Once the base coat was dry, i mixed some of the AII Green with Nochnoy, "Night" colour from the same brand. It was used as a wash and blended to give the model a weathered look.

And here disaster struck. What step did this faithful servant of your not observe? Priming. The fuselage's silver paint lifted when the masking tape was pulled off. That's why you prime model kits. to stave off situations like this one.

Since the area affected was not to have decals on it, I proceded to place them, which settled down nicely. Also, and to take away from the situation, I started my first glider kit from PZW, the IS-1bis "Sep".

What to do? Out with the AII Aliminium and Humbrol H-11 Silver and brush paint the offending - offended, actually - areas to replicate a weathered look. Came out rather nice!

Everything was sealed with Satin Cote and major assembly continued.


I had forgotten to add the ever present tachometer attached to the middle cabane strut, so it was scratchbuilt from stretched sprue. Aeroclub rigging material was used, although it gave a lot of problems, refusing to attach even when using a new bottle of superglue. I guess is had gone beyond its best use before date.

While waiting for the little bit of rigging done to cure (and decide how to follow it afterwards), bits like the wheels, engine and armament were taken care of. I would not recommend to anyone to follow some radioactive coloured profiles out there regarding ordnance. Fine information can be found in Massimo Tessitori's forum and website on soviet aviation, instead. I painted my FAB-50 bombs with an old Molak RLM-76 which had turned greyish in hue and quite like the primer used on them.
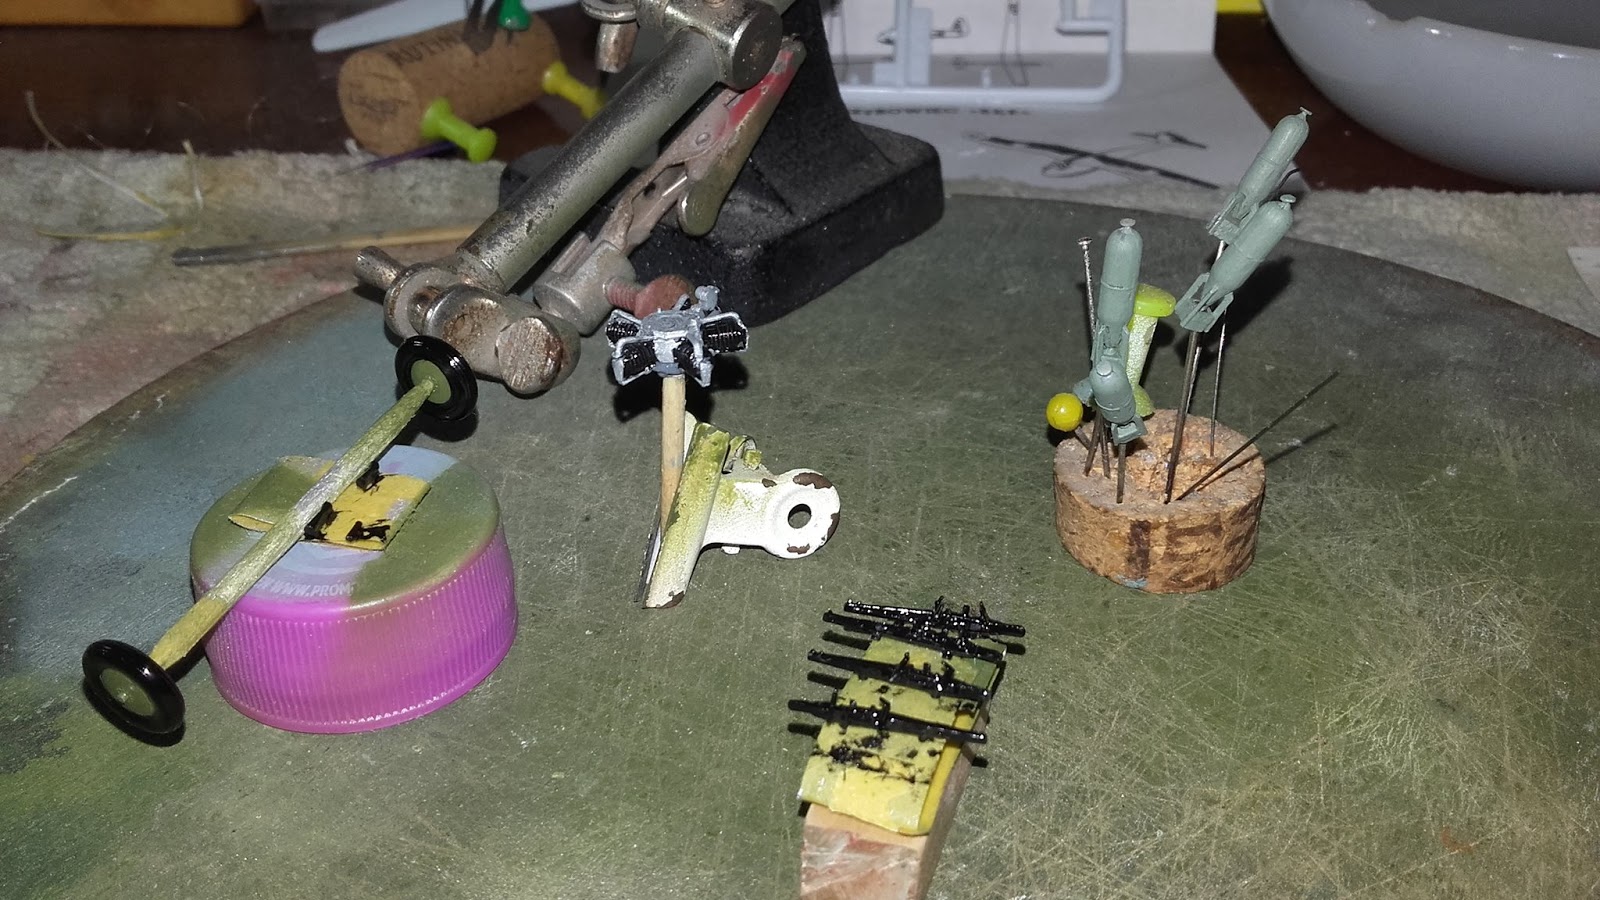
The engine was given a black wash and using Rust and Oil effects, some details picked. About the twin cylinder collector, it was scrounged from the earlier KP U-2 build.


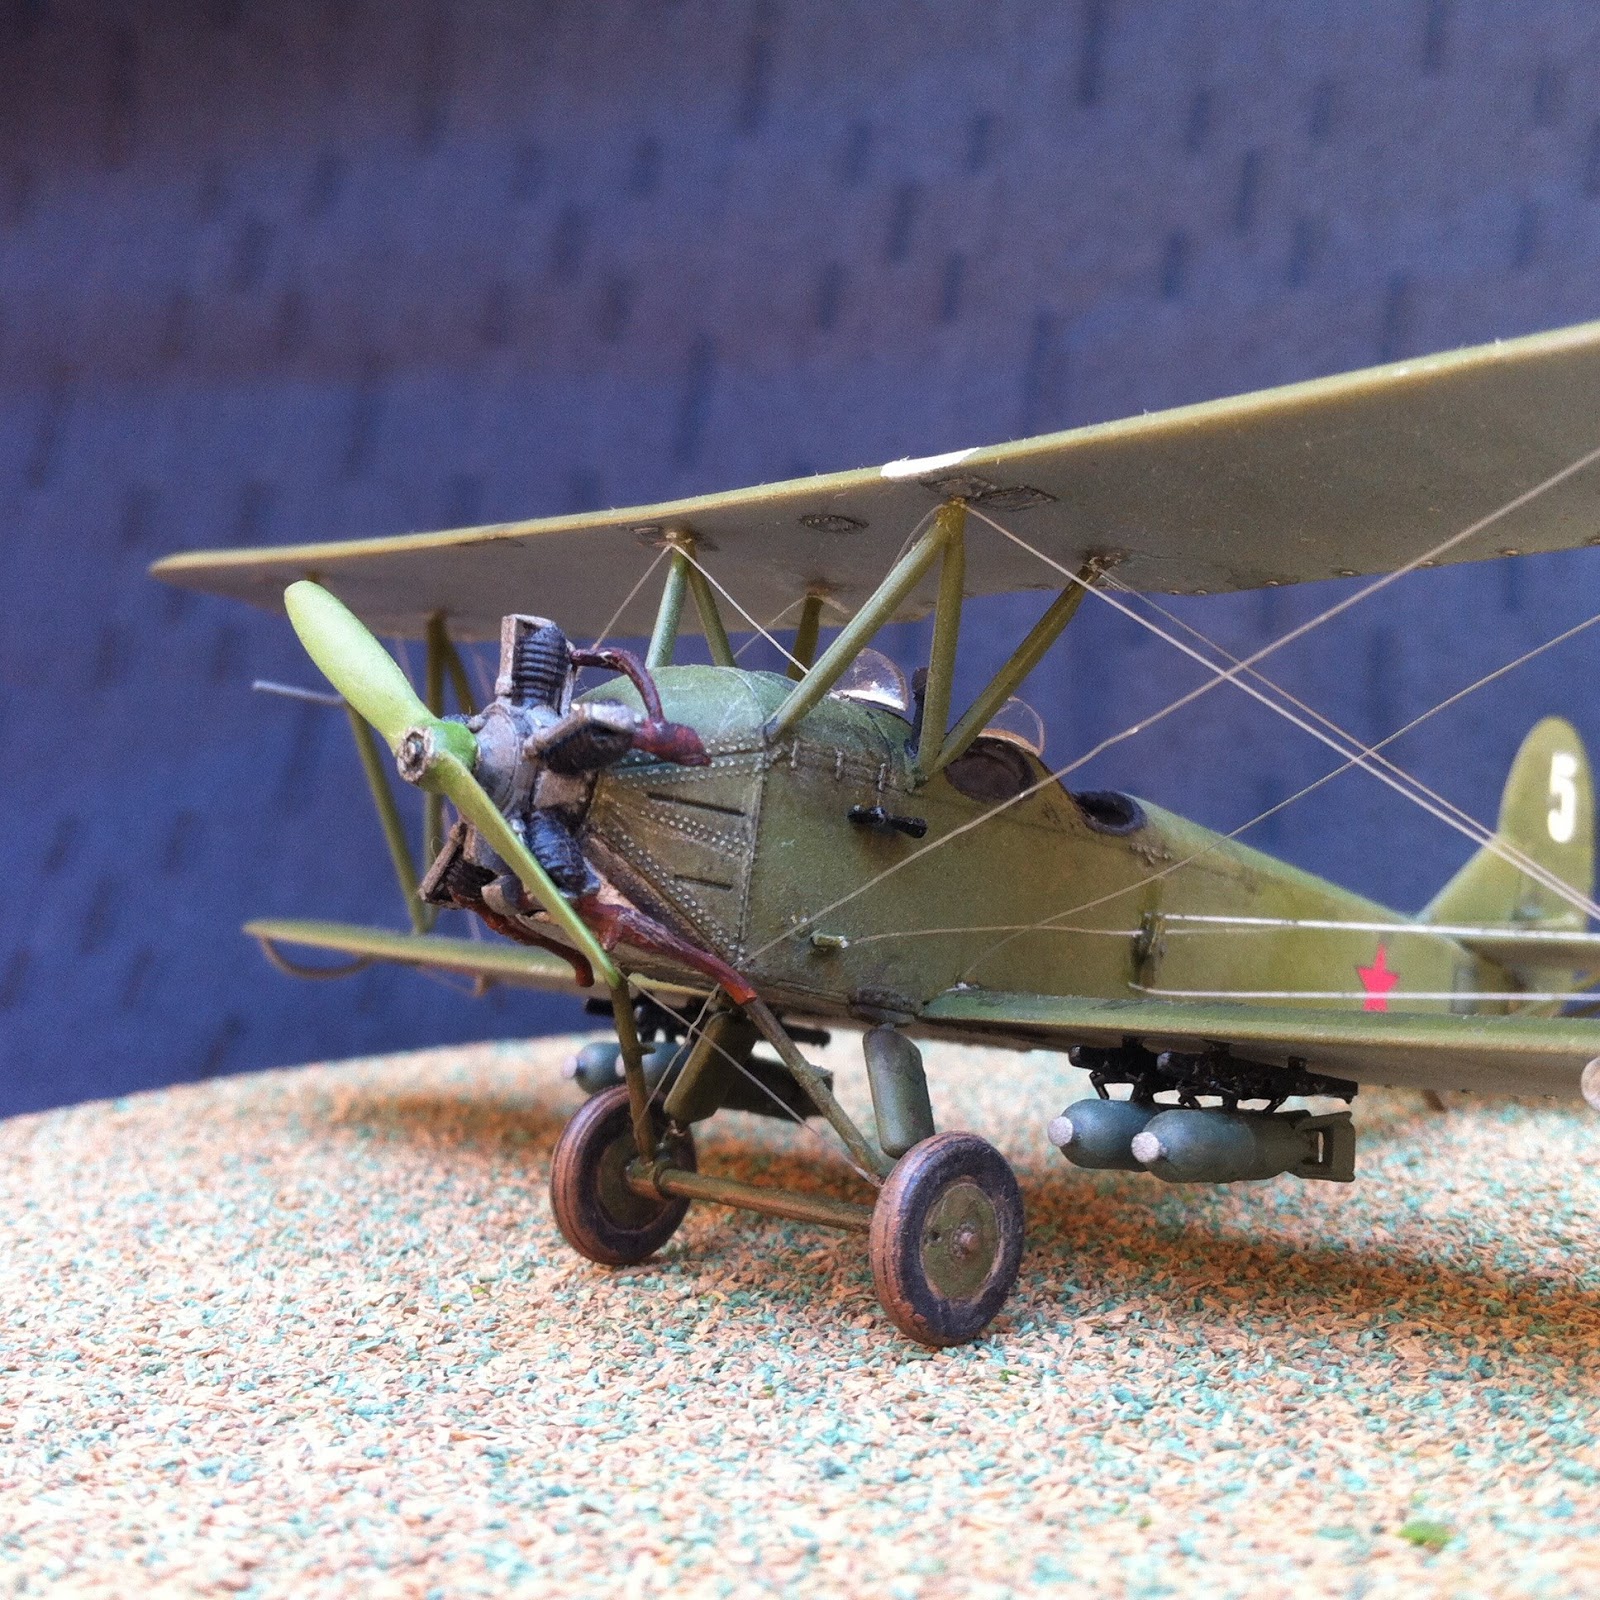
With major assembly complete, it started to look like a Kukuruznik in all of its humble glory.

Further weathering was done to the airframe by lighly spraying it with Humbrol H-119 Matt Light Earth to achieve a dusty appearance.

H-118 Matt US Tan was then speckled highly diluted to achieve some pin-point dirt gathering on the most walked-on surfaces and on the undersides, collected from the propeller turning.

Highly diluted black and brown were used to pin wash some areas, oil and fuel spills achieved with Fresh Engine Oil from the Mig 7 set.


The undersides showing the weathered surface typical of the rough theater of operations where these machines had to fly.


While Waiting for things to dry, further work was done in ICM's old and venerable Fokker E.IV. An article on the model has long been in the tooth and yet never got the interest to actually complete it. Oh, well.

Once everything was dry, it was a matter of attaching the final bits and bobs and the second Kukuruznik was finished. Here's the end result.


And in broad daylight :D


It was a fine and interesting build for the time. Using some weather techniques I had not tried before. Years have passed ans i'm still learning. I guess we all do. ICM announced the issue of a new 1/72nd kit, issuing the problems of this kit. if you don't want it anymore, this one or the KP kit, send 'em to me. I still have 80 more decal options to go!
As of this year, The Epic kukuruznik has taken more forward speed.
Stay safe, and as always, take care and good luck.
TMU
Comments